2: Breakdown
 |
Sorry Johnny 5, we're disassembling.
|
So I finally began to take apart the cabinet. I have to say, it was fascinating to see the inside of this thing. When I picked up the piece it was missing some things but that's ok because I purchased it mainly for the frame. But there was still enough stuff in there to keep it interesting. And not to mention plenty of parts that I think/hope I can re-use.

It's amazing to see how these machines worked. And how MUCH equipment and parts were needed to make an 8 bit character jump, squat, blow all your quarters and want you to bang your head against the 18 inch tubed television screen. The part that blows your mind is that the system I will be eventually installing in the cabinet is only the size of a wallet AND it can hold 1000+ more games than the original arcade. Most Excellent!

 And I love that the coin slot, mechanics and cash box is still in tact. Again, so many parts and wires to tell the computer to let me play a game when I put a coin in. I guess the algorithms for the occasional "spit the quarter back out even though there is nothing wrong with it" and the, "get stuck until you put $1.00 worth in but credit you for 1 coin" takes a-lot of computing power. One of the coolest discoveries was these old controls for reset and screen adjustments and the play counter. I hope to reuse these parts in my build. The old computer speakers I am repurposing have a volume & base control, so I can wire to use those nobs. I think I can rewire the reset button on the surge protector I will be using to the reset switch on this panel. And as for the counter, I would love to figure out how to wire it so that when I turn on the power, it will register one use to the counter. So any electricians or engineers that have and suggestions, I would love your feedback & knowledge.
  The speaker is great to have and there was also a fluorescent light fixture in the top marque space. I hope it works; I just need to buy the right size bulb to test it out. As mentioned before, I will plan to use a computer speaker system I have laying around. The speaker that came with the unit works, but since I removed all the other "stuff", it doesn't have an amp. But I think I will use the speaker from the cabinet as the base speaker and add a left and right speaker to the unit. (You follow me?) Can't wait to drop my 8 bit beats on this system, yo.
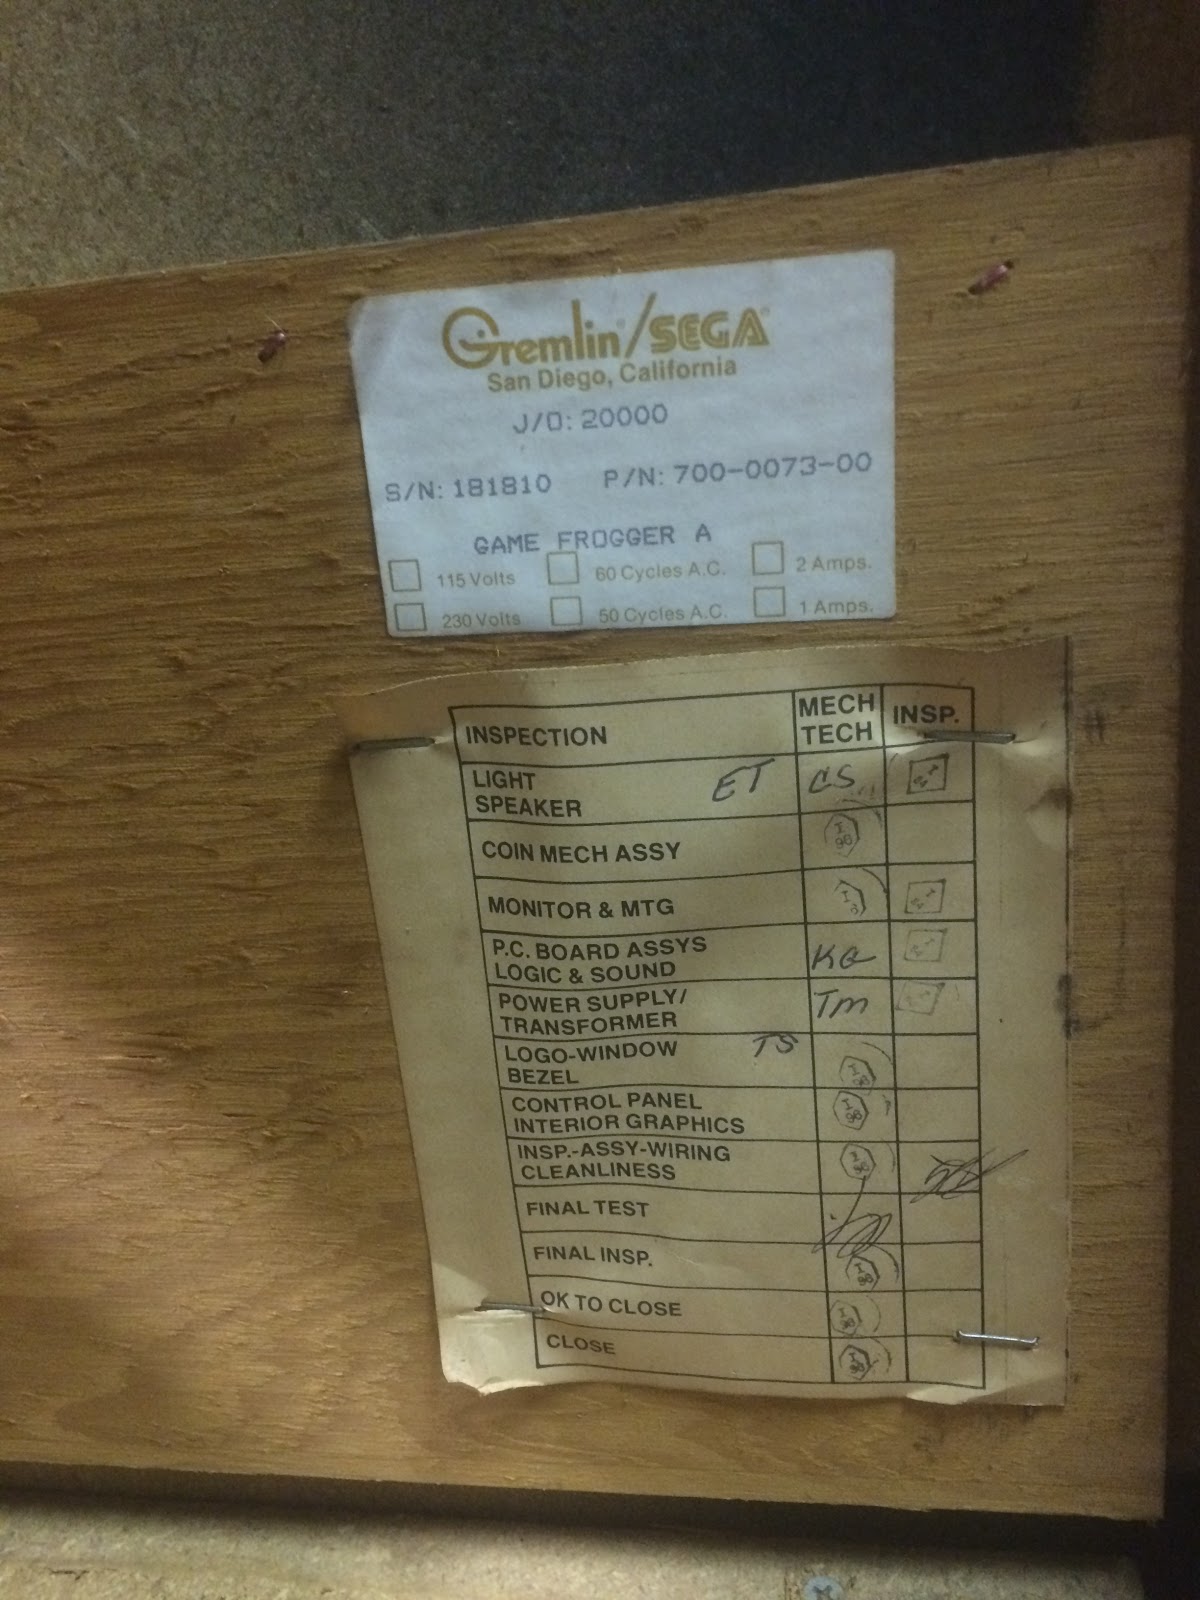
Finally, one of my favorite parts was finding all the original manufacturing tags, dates and company information; the nostalgia is just oozing out here. This was originally a Frogger game, and it was built when I turned 1 year old. I guess the gaming universe was telling me it is meant-to-be. I am going to have to think of a way to display these on the finished cabinet. Don't know where yet, but I have plenty of Mod-Podge...

Now that all is said and done, there is plenty of empty space in this cabinet. I will only need the top half of the space for the mechanics, so I think I'm going to use the bottom half for storage. Make the front panel a cabinet door and the bottom base have a pull out drawer.

Up next: repair and building!


Well I must say you are making good progress. My only suggestion would be to keep the theme of the cabinet as authentic as possible.
ReplyDelete