3. Repair
 |
| "Wow! Look at that high definition face!" |
Now that I have taken all the stuff out of the arcade cabinet, now it's time to fix it up. I would say that two-thirds of the piece is in good condition, but the bottom sections have suffered a little. It looks like water damage; my guess is someones basement flooded and the particle board started to soak up that water like a sponge. Not the fun loving yellow sponge that has an annoying voice yet a heart of gold, but the type of sponge that was used to clean up some mystery fluid that DID NOT smell good and you need to throw it out.
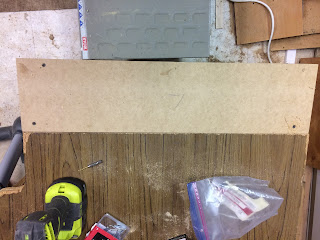
So I decided that I will remove the bottom 6 inches of each side and replace it with 3/4" MDF. I don't plan on keeping the faux-wood look on the outsides, so I will use that wonderful fill-all, Bondo to hide the seams, sand then paint the entire piece. I am not worried about structure/support because there is an internal wall in the base that I can laminate the new piece to. This went very well and no major internal damage, just surface stuff. I was also surprised that I remembered to cut the channel on the front edges to receive the plastic T-molding. I am usually one of those people who install it all, then look at it and say, "Ah crap; I forgot to do (fill in the blank here)!" I am pretty good about the measure-twice-cut-once thing, but we all have our weaknesses. I also replaced the front base plate area; that piece has definitely seen better days!
As far as repairs are concerned, that is mainly it. From this point forward, I will be building and customizing the cabinet itself. I have plans to use half of the piece for storage, adding & building out the control panel and adding the monitor & screen. Now, I have to start drafting, sketching measuring and doing my own flair. And don't worry I have more than the minimum 15 pieces, 31 pieces actually and I will express myself!


Comments
Post a Comment